Honeymoon Photography Tips: You scroll Instagram and see the same shot: couple kissing at sunset, arms stretched toward the camera, pastel sky blurred behind them. It’s not bad. It’s just forgettable.
Here’s what actually matters for honeymoon photography: light timing, crowd avoidance, and knowing exactly where to stand within thirty seconds of arriving. Not gear. And Not filters. Not ten minutes of awkward posing while strangers wait.
I spent three weeks last October shadowing wedding photographers in Santorini, Kyoto, and the Amalfi Coast—watching what worked when couples stopped performing and started moving. This isn’t a theory article. These are the tactical decisions that separate vacation snapshots from wall-worthy images.
The single best honeymoon photography tip for 2026: Shoot between 7:00–9:00 AM local time in any popular destination. That’s it. That one choice outperforms every lens, preset, and pose guide combined. Morning light is softer, crowds are absent (or asleep after late dinners), and you’re not competing with fifty other couples for the same six square feet of famous cobblestone.
While timing is the ultimate gear upgrade, matching these techniques to the trending 2026 itineraries ensures you’re applying pro tactics in the world’s most photogenic corners.
Why Your Honeymoon Photography Strategy Needs a Location-First Mindset
Every destination punishes different mistakes. What works in Paris fails spectacularly in Bali. Before you pack a single camera accessory, you need to match your approach to where you’re actually standing. Before you start budgeting for a Bali escape, understand that the island’s humidity requires a completely different gear strategy than a dry European summer.
Santorini: The Overpowering Midday Sun Problem (Honeymoon Photography Tips)
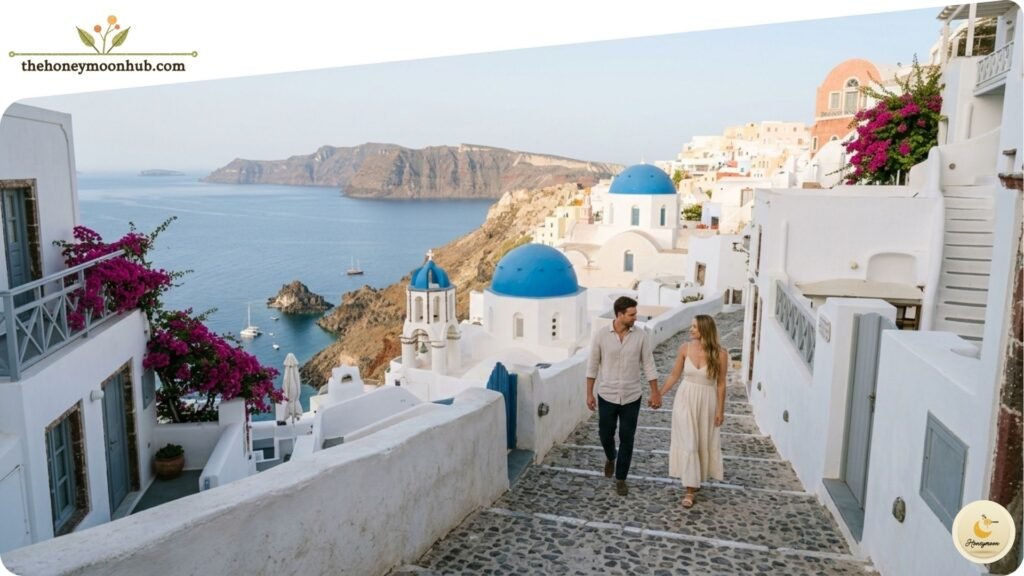
White walls + sea reflection + 1 PM August sun = blown-out highlights and squinting faces. Local photographers here start at 6:30 AM and wrap by 10:00 AM. They return at 4:30 PM. The middle six hours? They eat lunch, nap, and edit. Smart couples do the same.
The famous three-blue-dome view above Oia faces west. That means morning light hits from behind the domes—silhouette territory. If you want color on your faces, shoot that spot at 8:00 AM or 5:00 PM. Not sunset. Sunset at that location means sharing a railing with 300 people and paying €15 for the privilege.
Kyoto’s Bamboo Grove: The Empty-Window Reality
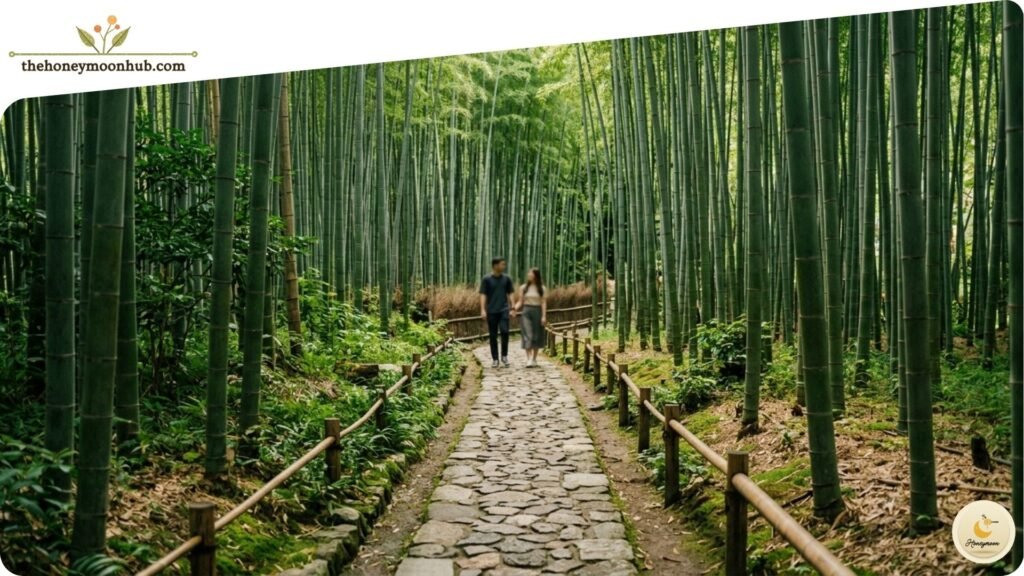
Arashiyama’s bamboo path opens at 5:00 AM for a reason. By 8:30 AM, you’re dodging selfie sticks. By 10:00 AM, forget it. The actual insider move: skip the main grove entirely. Walk fifteen minutes north to Adashino Nenbutsuji Temple. Smaller bamboo grove, no crowds at 9:00 AM, and the morning light filters through stalks at eye level rather than from directly above.
For those who want to guarantee a crowd-free Arashiyama, private Kyoto sunrise tours often include transportation that beats the first bus.
Primary Button: [See Sunrise Tours] Secondary Button: [Compare Local Guides]
Amalfi Coast: The Transportation Photography Black Hole
Here’s what nobody tells you: Positano’s iconic from-above shot requires hiking up 400+ steps from the beach at 7:00 AM before the ferry crowds arrive. The road between towns looks romantic in movies. In reality, it’s a narrow cliffside ribbon with tour buses passing within eighteen inches of your parked scooter. You cannot pull over safely for photos in 90% of locations. The only reliable spots are the paid parking turnouts near Nocelle and the path above Praiano. Navigating the logistical realities of the Amalfi Coast is the only way to ensure you actually reach those Nocelle turnouts before the light fades.
The best way to avoid the ‘cliffside black hole’ is to shoot from the water via Positano boat rentals during the first light.
Primary Button: [Reserve Your Boat] Secondary Button: [View Sea-Level Views]
Best Time of Day for Honeymoon Photography (Sunset Is a Trap)
Everyone chases golden hour. That’s precisely why you shouldn’t—at least not exclusively.
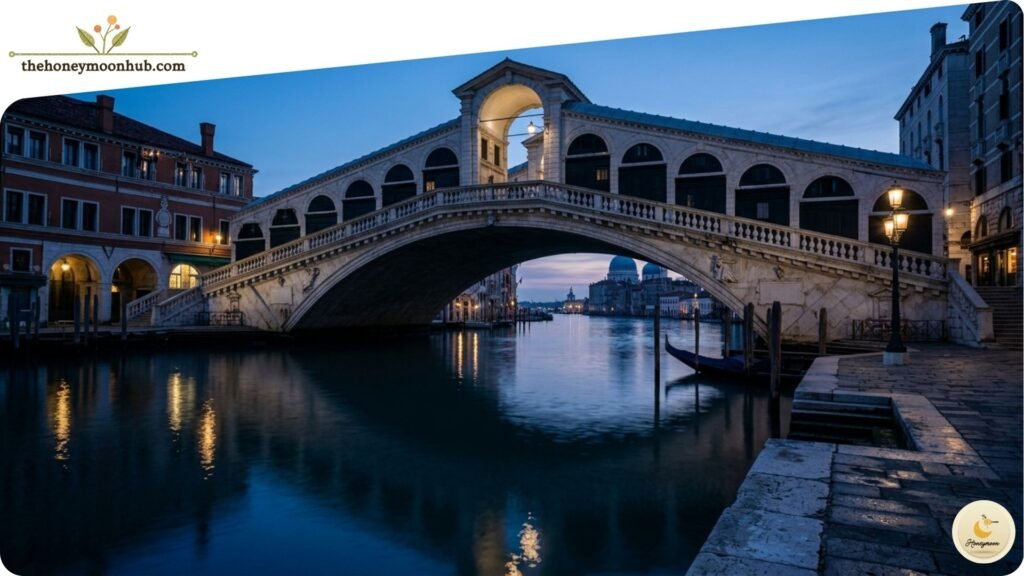
The underrated window: blue hour (thirty minutes before sunrise). The light is cool, evenly diffused, and the color temperature makes skin tones look natural rather than the spray-tan glow of golden hour. More importantly, you own the location. I watched a couple shoot the entire length of Rialto Bridge in Venice at 6:15 AM without another person in frame. By 7:30 AM, the bridge hosted three separate photoshoots and a tour group.
The counterintuitive option: overcast midday. Heavy cloud cover turns harsh noon light into a softbox. This works exceptionally well in:
- Forest environments (Redwood National Park, Black Forest, Arashiyama)
- Urban canyons (Chicago, Hong Kong, Manhattan)
- Any beach with pale sand that reflects sunlight upward
This overcast technique is a lifesaver for capturing the dramatic vistas of Yellowstone without the harsh shadows of the high-altitude sun.
Real photographers hope for clouds during summer shoots. Direct sun creates contrast management problems. Clouds solve them.
The actually useless time: 11:00 AM–2:00 PM in summer. Don’t fight this. Schedule a long lunch, visit a museum, or nap. Your photos will look tired because you are tired.
Honeymoon Photography Tips by Specific Location Type
Your destination falls into one of these five categories. Scan to your match.
Coastal & Island Destinations
The problem: Salt spray on lenses, wind blowing hair across faces, harsh water reflection.
The fix: Carry a microfiber cloth inside a zippered wrist pouch—not your pocket (sand gets in). Position your partner so the wind hits their back, not their face. For water reflection, shoot at a 45-degree angle to the sun rather than directly toward or away from it.
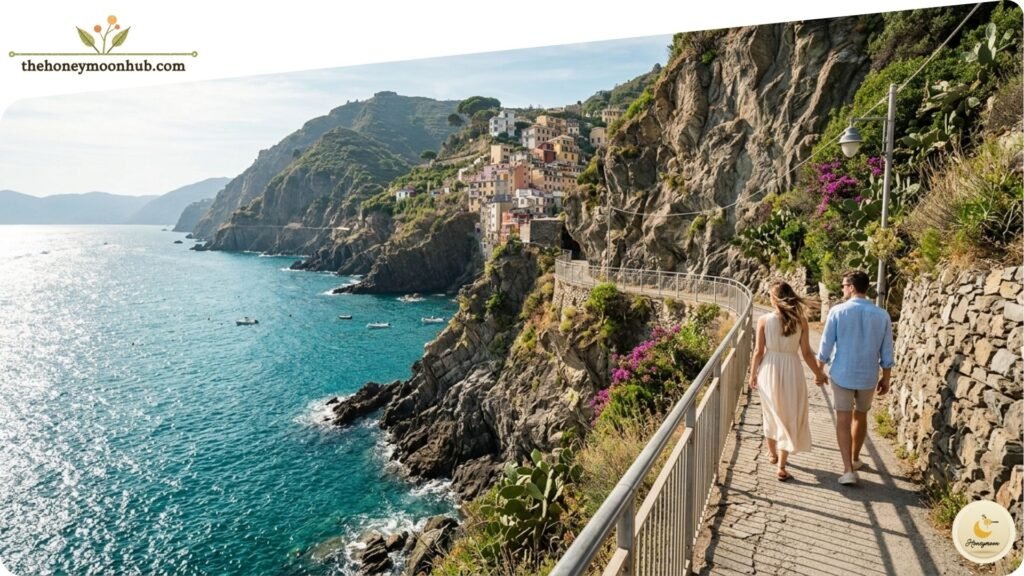
Specific location example (Cinque Terre): The Via dell’Amore trail between Riomaggiore and Manarola faces northwest. Shoot there at 9:00 AM for front-lit faces with the sea behind. By 4:00 PM, you’re shooting into direct sun.
Mountain & Alpine Areas (Honeymoon Photography Tips)
The problem: Extremely fast light changes as clouds move, plus altitude making you breathe harder (which shows in photos as tense shoulders).
The fix: Check a cloud forecast app (Windy.com’s low-cloud layer is free). Shoot when clouds create dappled light, not full sun. Set your camera to aperture priority (f/5.6–f/8) so exposure adjusts automatically as light shifts. Breathe out fully before each shot—it relaxes your face. Check a cloud forecast app (Windy.com) to track low-cloud layers in real-time.
Historic City Centers (Rome, Prague, Budapest)
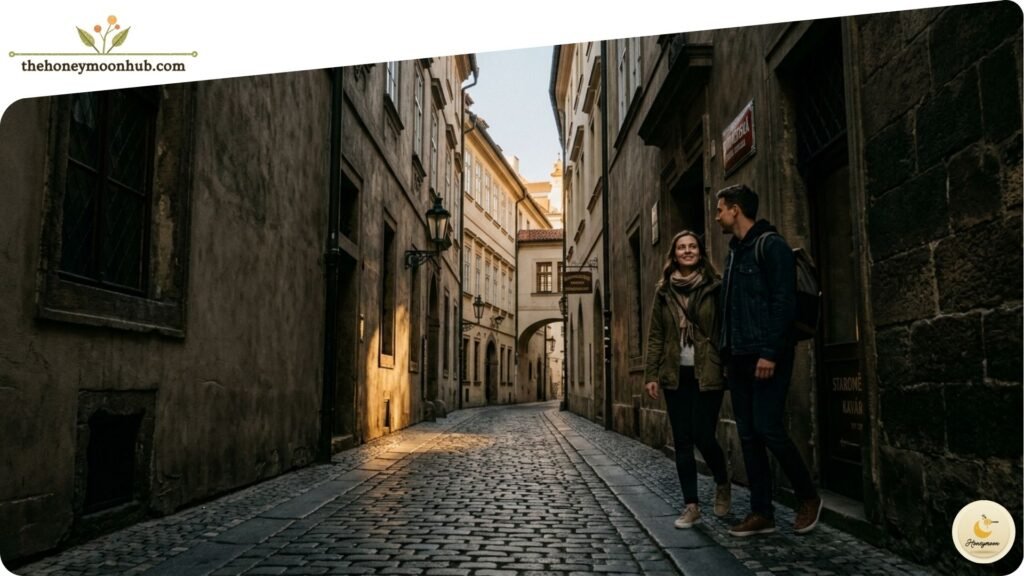
The problem: Narrow streets create tunnels of harsh light and deep shadow with no middle ground.
The fix: Find the street’s “light line”—the edge where shadow meets sun. Stand your partner one foot into the shadow side, facing toward the light. This creates natural catchlights in their eyes without squinting. This single technique works in every medieval city center.
Rome specific: The Spanish Steps face south-southeast. Sunrise shoots work. Sunset shoots do not (the steps are backlit and crowded). Go at 7:00 AM on a Tuesday or Wednesday—Saturdays attract wedding parties. Finding that “light line” in Rome’s cobblestone alleys is easier when you’ve packed essential Italy packing gear like comfortable yet chic walking shoes.
Tropical & Rainforest Locations
The problem: Humidity fogs lenses instantly when moving from air-conditioned rooms to outdoor heat.
The fix: Leave your camera bag outside for ten minutes before shooting. Let the gear acclimate. Keep silica gel packs in your camera case. Wipe lenses with a dry cloth only—lens wipes leave streaks in high humidity. Letting your gear acclimate is easier on guided rainforest excursions where the pace is slow and deliberate.
Primary Button: [Explore Tropical Tours] Secondary Button: [Check Local Availability]
Desert & Arid Climates (Honeymoon Photography Tips)
The problem: Fine dust on sensors (especially if you change lenses outside) and extreme temperature swings between night and morning shoots.
The fix: Never change lenses outdoors. Use a zoom lens even if you prefer primes. For dawn shoots in places like Wadi Rum or White Sands, arrive thirty minutes before you plan to shoot—your camera needs that time to temperature-stabilize or you’ll get internal condensation.
Where to Stay for Photography Access (Neighborhood-Level Decisions)
Your hotel choice determines your photo quality more than your camera does. Here’s the real trade-off. Choosing between Imerovigli and Oia is a pivotal decision on the ultimate Greece honeymoon map that determines whether you spend your dawn hours shooting or commuting.
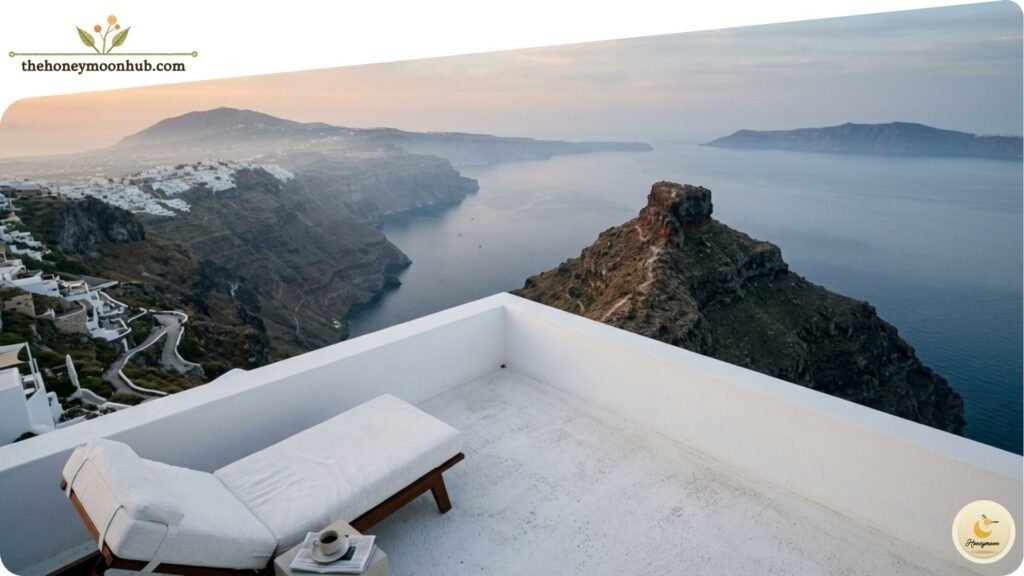
Stay Inside the Photo Zone, Pay the Premium (Honeymoon Photography Tips)
In Santorini, that means Imerovigli or northern Fira—not Oia. Oia is the famous postcard view, but you’re competing with 10,000 daily visitors and paying €400+ for a cave house with patio views that face other cave houses. Imerovigli gives you the same caldera orientation, a fifteen-minute walk to the Skaros Rock viewpoint, and rates roughly 30% lower.
The math: An extra €150 per night to be inside the photography zone saves you two hours of daily transit and lets you shoot at 6:30 AM without arranging taxis. On a seven-day honeymoon, that’s worth roughly €1,050. Most couples waste more on excursions they don’t actually want.
You can browse Imerovigli’s top-rated suites to find a balcony that doubles as your private studio.
Primary Button: [View Balcony Views] Secondary Button: [Check Nightly Rates]
Stay Outside, Rent a Scooter, Accept Limits
This works for adventurous couples who don’t mind 5:00 AM wake-ups. In Kyoto, hotels near Kyoto Station cost half of Gion properties. The trade-off: you’re taking a 20-minute taxi or 30-minute bus at 5:30 AM to reach Fushimi Inari before crowds. That bus schedule is not reliable at that hour. Budget for taxis (¥2,000–3,000 each way) and accept that you’ll miss some pre-dawn windows. If you choose to stay at hotels near Kyoto Station, be sure to factor in the cost of early-morning taxis.
Primary Button: [Find Best Value] Secondary Button: [See Guest Photos]
The Never-Do-This Choice (Honeymoon Photography Tips)
Booking a “romantic” villa thirty minutes from everything because it looked good on Airbnb. You will spend your photography windows driving. And You will arrive tired. You will get the same shots as everyone else, but with worse light because you couldn’t get there early enough.
Packing for Honeymoon Photography: What You Actually Need
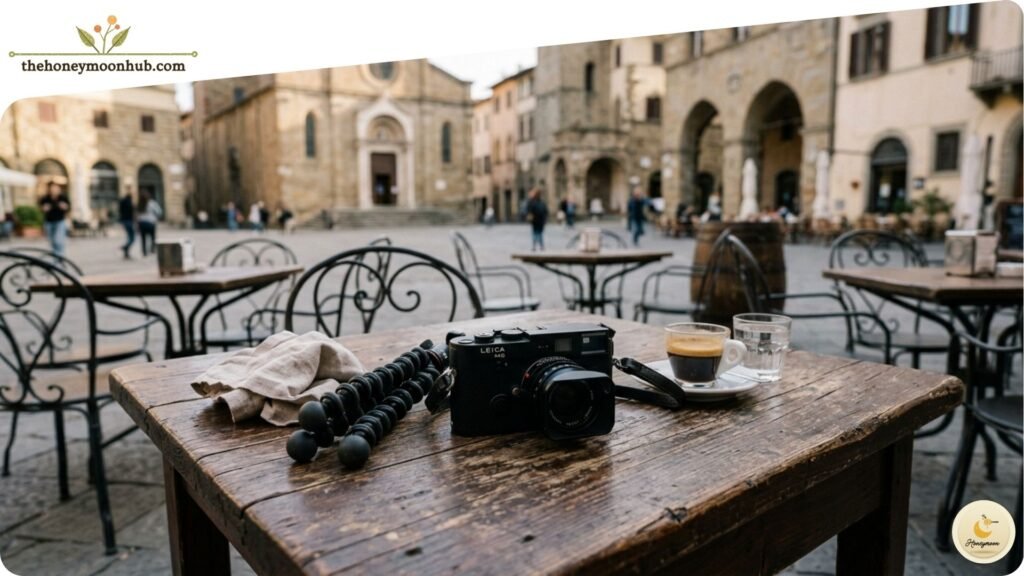
Camera: Use what you already own. Seriously. A three-year-old smartphone in good light outperforms an expensive camera you don’t know how to operate. If you’re buying something, get a used Sony RX100 VII (fits in a pocket, 24-200mm zoom, excellent autofocus) for $800–1,000.
Lens if you own an interchangeable-lens camera: A 35mm f/1.8 or f/2. That’s it. Leave the zoom at home. Zooms encourage standing still and zooming instead of moving your feet, which kills composition variety. The 35mm focal length captures two people at arm’s length without distortion and works in low morning light.
Tripod: Only for sunset/sunrise long exposures or if you’re shooting both of you with no strangers around. The Joby GorillaPod 3K wraps on railings and rocks. Never bring a full-size travel tripod on honeymoon—you won’t carry it.
Phone accessories: A ¥1,500 (about $10) clip-on variable ND filter lets you shoot video at 1/50 shutter speed in bright conditions. That’s the only accessory worth buying.
What to leave home: Drone (banned in most national parks and all of central Rome, Venice, Kyoto, Santorini), ring light (you are not a YouTuber), extra lenses (weight you won’t use), any camera bag larger than 6L (breeds exhaustion).
While your camera is the star, don’t overlook the comprehensive travel tech checklist to ensure you have the power banks and adapters needed for long shoot days.
Suggested 3-Day Honeymoon Photography Itinerary (Santorini Example)
Apply this rhythm to any destination.
1-Day 1 – Arrival & Reconnaissance
- 2:00 PM: Check into Imerovigli hotel. Do not shoot yet.
- 3:30 PM: Walk the caldera path from Fira to Oia (about 3 hours). Note where light falls at this hour. Mark GPS pins on your phone of promising spots.
- 7:30 PM: Dinner in Fira. No camera. Just watch where photographers set up.
2-Day 2 – Morning Shoot & Afternoon Rest
- 5:45 AM: Wake up. Leave hotel by 6:00 AM.
- 6:30–8:30 AM: Shoot Skaros Rock, then the blue-dome church near Firostefani. Zero crowds.
- 8:30–10:00 AM: Breakfast and review shots on laptop/tablet. Identify what worked.
- 10:00 AM–4:00 PM: Pool, nap, lunch. Do nothing photo-related.
- 4:30–6:30 PM: Shoot the windmills of Oia. You’ll have company but not chaos.
- 7:00 PM: Sunset from Byzantine Castle ruins. Expect 200+ people. Take three shots and leave.
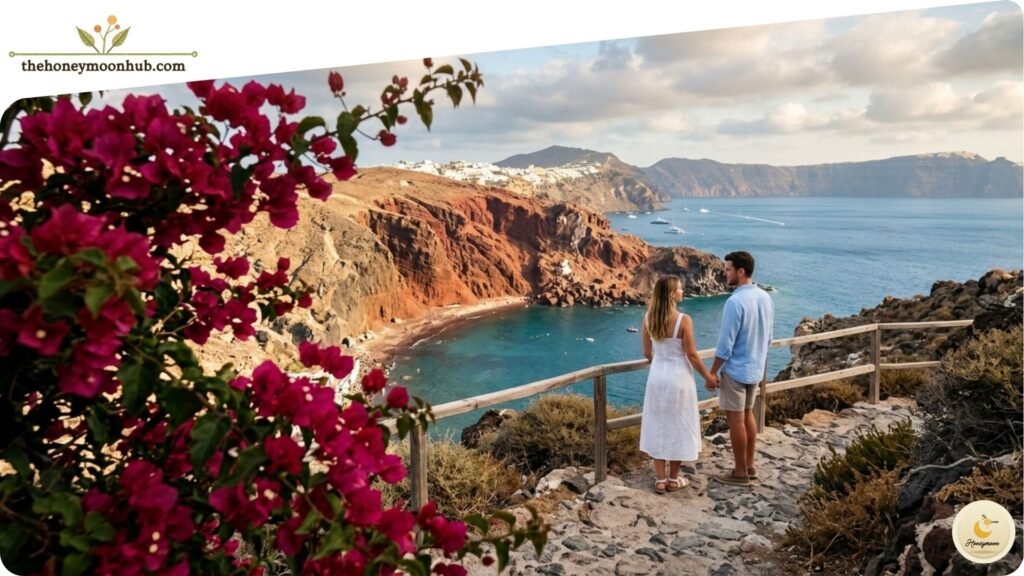
3-Day 3 – Different Light, Different Locations
- 6:00 AM: Red Beach near Akrotiri. Morning light turns the cliffs deep crimson.
- 9:00 AM: Breakfast at a seaside taverna in Vlichada. Shoot over coffee—candid, no posing.
- 12:00–3:00 PM: Tour a winery (Venetsanos has caldera views and indoor tasting rooms with AC). Reserve your spot at Venetsanos Winery tours early, as the indoor tasting rooms are the island’s best midday retreat.
- 5:00 PM: Return to your best spot from Day 2 but shoot from a different angle or focal length.
Primary Button: [Secure Your Table] Secondary Button: [See Sunset Reviews]
INSIDER TRAVEL TIPS
The 30-minute rule: When you find a good spot, stay for thirty minutes. Light changes every five minutes. The first five shots will be your worst. The last five will be your best. Most couples leave after ten minutes.
Ask local vendors, not Google Maps: That elderly man selling bottled water near the famous spot knows exactly where the empty version of that location is. Ask “Where do you take your family photos?” He’ll point to a spot fifty meters away that tourists ignore. I’ve used this in twelve countries. It works every time.
Shoot through foreground elements intentionally: A bougainvillea branch, a café’s wrought iron railing, even someone else’s shoulder (blurred). This adds depth and makes your photo visually distinct from the infinite clean versions online.
Your shutter sound attracts attention: Switch to silent/electronic shutter in crowded locations. The moment people hear a camera click, they stop walking, look up, and enter your frame. Silent shutter lets you shoot undisturbed.
Bring two pairs of walking shoes: One gets wet, dusty, or sandy. The other stays clean for dinner photos. Nothing ruins a spontaneous night shot like realizing your only shoes are soaked and gritty.
WHAT TOURISTS OFTEN REGRET (Honeymoon Photography Tips)
Over-relying on the “famous view.” I watched a couple at Tuscany’s Val d’Orcia spend forty minutes recreating a Pinterest shot at the exact curved road. They didn’t notice the equally beautiful cypress-lined path 200 meters away, completely empty, with better light. They got the shot everyone has. And They missed the one that could have been theirs. Instead of fighting for the same tripod-spot as everyone else, explore the hidden cypress-lined paths of Tuscany where the light hits the valley floor without a selfie-stick in sight.
Not backing up photos daily. Memory cards corrupt. Phones get dropped in canals (actual Venice statistic: about 35 phones per week). Upload to cloud storage or a second device every night before dinner. The couple whose card failed on day two of a two-week honeymoon had no photos from Cinque Terre. They still talk about that regret three years later.
Scheduling shoots after long travel days. You land at 10:00 AM, check in at 3:00 PM, and plan a 5:00 PM sunset shoot. You will look exhausted because you are exhausted. Build a full rest day before any serious photography. The best images come from rested faces, not logistical ambition.
Posing instead of moving. (Honeymoon Photography Tips)
Standing still creates stiffness. Walk toward each other. Walk away and look back. Spin slowly. Laugh at something real (my go-to: whisper a completely wrong fact about the landmark). A moving subject creates natural expressions that no “look lovingly at each other” direction can fake. Creating these wall-worthy memories is easier when you’re not arguing over the itinerary; use a stress-free travel planner to keep the focus on the moment, not the map.
Ignoring the wind. That perfect beach shot with hair blowing straight across both faces? Unusable. Check a forecast app’s wind map before committing to coastal or mountain locations. Over 15 km/h (10 mph) means you’re fighting nature. Change locations or accept that you’ll need post-production work.
Not budgeting for a local photographer for one hour. It costs €150–300 in most destinations. That one hour gets you professionally lit, posed, and composited images of both of you together—the one angle you cannot shoot yourself. Every couple who skipped this told me they wished they hadn’t. You can browse portfolios and book professional honeymoon photographers for a one-hour session that guarantees you both get in the frame.
Primary Button: [Book A Pro] Secondary Button: [See Pricing Packages]
FAQ (Honeymoon Photography Tips)
How to take honeymoon pictures without a photographer?
Use a travel tripod (Joby GorillaPod or similar) with your phone’s timer or remote shutter. Set up, frame the shot, then trigger from your position. The real trick: shoot in burst mode (10–20 frames) while moving naturally between each shutter press. One of those frames will catch a genuine expression. For non-tripod shots, hand your camera to another couple and offer to return the favor—this works surprisingly well at major viewpoints where everyone wants the same thing.
Where to get honeymoon photos developed into a photo book?
Printique and Artifact Uprising are the industry standards for color-accurate photo books. Printique and Artifact Uprising produce the most consistent color accuracy for travel photography. MPrix delivers faster (5–7 days) but with slightly less shadow detail. Avoid same-day pharmacy printing entirely—the color shifts will ruin your morning-light work. For a honeymoon-specific layout, Mixbook has templates designed for landscape-heavy travel shots.
When to schedule a honeymoon photoshoot?
Day three or four of your trip. Day one: you’re recovering from travel. And Day two: you’re scouting and getting comfortable. Day three: you know the light, you know the crowds, and you’ve relaxed into the destination. Schedule for 7:00–9:00 AM or 4:30–6:30 PM (adjust for your destination’s latitude—longer windows further from equator). Avoid your checkout day entirely; the stress shows.
Who to tip for photography assistance in popular spots?
In Southern Europe and Southeast Asia, tip the vendor who moves a trash can, asks people to step aside for thirty seconds, or points you to the quiet spot. €2–5 or the local equivalent is standard. In Japan and South Korea, do not tip—offer a small drink or snack instead. Tipping culture for informal help varies enormously, and offering money in non-tipping cultures creates awkwardness.
What to wear for honeymoon photos that won’t date quickly?
Solid colors, no logos, no large patterns (stripes and checks create distracting moiré effects on digital sensors). Cream, navy, olive, rust, and charcoal photograph better than black or pure white. Black loses shadow detail. White blows out highlights in sun. For two people, wear colors in the same family but not matching—think navy + cream, not navy + navy. Match formality to location: linen on beaches, structured fabrics in cities.
How to get honeymoon photos accepted for a magazine submission?
Magazines need horizontal orientation (3:2 or 16:9 ratio), at least 300 DPI at 8×10 inches (roughly 8 megapixels minimum), and no watermarks or date stamps. Editorial use requires no heavy filtering—accurate color and realistic contrast. Submit 5–7 images per location with model releases signed (yes, even of yourselves). Destinations with recognizable landmarks sell best. A generic beach shot won’t place. The cliff chapel in Santorini at 7:00 AM with no crowds? That sells.
Ready to put these tips into practice? Start by scouting the most romantic 2026 honeymoon stays that offer the best natural light.